Friday, January 25, 2013

How to Choose the Video Card for Your PC

Although we have covered this area in the past (remember the tutorial on how to buy a video card?), we thought that a little update on the subject could not hurt. Video card technology is rising quickly, and GPUs are getting better and better with each passing month. Because of this rapid advancement in technology, the average user gets sometimes confused when buying such a device. Also, the manufacturers of video cards give them names and specs that are complete gibberish for most. For example, in a video card, unlike what you see in a CPU, you have not one, but three clock values (the ones measured in MHz and GHz) and other specs that don’t make any sense. What is important to know, is that these specs can be very misleading, and if you go for the biggest numbers, you might end up with a video card that is not as good as others in the same price range.


Bigger numbers – more power?

 Not quite true. Although the bigger numbers mean something, sometimes you pay for those numbers and you do not get anything in return. For example, a video card with 4 GB of VRAM (this is the video memory) can have the same performance as one with 1.5 or 2 GB of VRAM memory. Why? Because that memory is not directly proportionated to the amount of power a video card has, but that is the “pipeline” the video signal travels from the GPU to the monitor. Bottom line is that the video resolution of your screen is the one which determines what video card you need. For bigger screens and resolutions, the video card needs more power, for smaller screens, less.

 Also, if you buy a video card, you need to think at what you are going to use it? Are you a casual gamer who plays indie games, a hardcore gamer or you want to see movies on a big HD screen? For each type of load, there are lots of video cards that can do just fine, but if you need only a small amount of GPU acceleration for a HD movie, it would be a waste of money to buy a top of the line video card, the same is true, if you play just a few, non-demanding games, you will not need a high end video card. Also, for graphics rendering and video editing, you might need specialized video cards, like the nVidia Quadro video cards, specially designed for these tasks, but not not good in gaming or others tasks.

 nVidia or ATI?

 As in the case of Intel vs. AMD, this aspect is not as important as in the past. Although they both have different approaches when it comes to GPUs, at the end of the day both nVidia and ATI make really good video cards. ATI gives its video cards lots of memory, up to 4GB in some cases, and this seems to work (looks like AMD, the owner of ATI does the same thing with its CPUs), but nVidia, like Intel, gives its video cards the very latest technologies and lots of raw power. Nowadays, the difference in performance, especially in gaming is not that much and so, what it boils down to is: what do each of us prefer? I myself am a nVidia fan.


 DO YOUR RESEARCH

The first step in buying a video card is to know what you will use it for, then consider your monitor, what resolution it has, how big it is, or if you have an array of multiple monitors, what is their total resolution. Then look at your motherboard to see what type of video card slot do you have. After this, when you know all of these things, go look for the video card that matches all your criteria, do not pay too much attention at the other specs until you find a few video cards that work with what you have. After this, search the web for benchmark results, reviews, and scores on those video cards. See what the experts say and from there, make your choice. There are lots of such websites, that offer great information about video cards and other components. A good example of such a website is Tom’s Hardware and also, communities of tech lovers and overclockers (like overclock.net or hwbot.org) are a great source of information.

 BRANDED OR UNBRANDED?


If you ever gone browsing a store for video cards, you saw that the same product is offered by multiple companies. So you might see a nVidia GTX 680 that has the ASUS logo on it, or the Gigabyte or EVGA. Those companies buy unbranded video cards from the nVidia factory and then, re-engineer them for better performance. Sometimes they change the entire PCB, only keeping the GPU itself. Also, they add custom cooling systems, making those video cards much better than when they left the factory.

TOP VIDEO CARDS AT THE MOMENT

Because personal preference would stand in the way of making an accurate top, we decided to let the numbers speak. The overall performance of the video cards, tested on the same system and in all the same conditions paint a vivid picture of the performance each of them pack. Also, because technologies differ from nVidia cards to ATI cards, putting them head to head is the only way to truly find out what potential each of them has. In the fallowing charts, you can clearly see the difference in FPS (frames per second) and temperature of the video cards while running the same games and benchmark (Shotgun 2, Dirt 3 and Heaven 2.5 benchmark).

Test 1 – HD performance and maximum temperature
Test 2 – DirectX 11 gaming performance with and without tessellation active
Although a video card might prove to be the most expensive component in your PC, it is one of the most important. But technology seems to go in the direction of simplifying our choices. New models of CPUs from both Intel and AMD have integrated video processors, true, they are vastly inferior to video cards, but in the future, we might see them as one chip. Until then, remember that choosing your video card has as much to do with specs as with the environment it will operate in (I dare to say that the environment is more important): the case, the motherboard and the screen.

 PHOTO CREDITS: TECHRADAR

How to Buy a Video Card

The graphics card of a PC is its heart. Without it, a PC is useless. In a sense, it makes it visible. But graphics cards are always on the move. A few months passing before a new model or series comes along. And if today’s top video card is wanted by many, in two years it will be a mid-level card, offering satisfying performance for those who don’t play demanding games or render graphics. And because it’s a market on the continuous move, there is always need for a new one. Video Card Buying Guide But buying a new Graphics Card (or Video Card) can prove to be a daunting task. If you ever searched the market, then you know what it is I’m talking about: alphanumeric names that don’t make sense to anyone except the techno savvy and the enthusiasts. Specs that blow you away and keep on going page after page
In this tutorial I’ll try to give all this gibberish some sense, and give you a helping hand when buying a video card. To choose the best one that suits your needs without burning a hole in your pocket (and we all know how expensive these babies can get). First of all, you must understand that those numbers don’t fully reflect the potential of a video card, so don’t get impressed by the fancy names you might see.

VIDEO MEMORY DOESN’T MEAN PERFORMANCE

A very important aspect that you need to know is that memory is not everything! Video card manufacturers expect consumers to buy the video cards that have the biggest memory, so you will see some video cards that go up to 4 GB RAM. However, it is important not to have too little memory, but everything in the range of 1GB of GDDR5 memory is more than enough. Be careful also to the type of memory: GDDR2, GDDR3 or GDDR5. GDDR5 is the best out there, so look for a video card that has this type of memory. The GPU (graphics processing unit) is probably the most important part of the video card. So when buying a new video card look towards a new processor, something from the latest technology. This will ensure you that your card will work great for at least two years.

DIRECTX VERSION – CARTOONS OR REALISM?

The DirectX driver is another important aspect, look for cards that offer support for the latest DX version (now it’s DirectX 11), anything lower than that will render your graphics at lower quality and realism. Bandwidth is again an important aspect. Measured in Gb/s, look for something that has as much as possible. So the bigger the bandwidth, the better. Also, tightly bound with this is the pixel fill ratio and texture fill rate. These values also have to be as big as possible. Keep an eye out for compatibility, so look at your motherboard and see what PCI Express slot you have and get your video card accordingly. There are PCI Express 2.0, 2.1 or 3.0 nowadays. Older AGP slots are rarely found and the technology has been abandoned.


INTEGRATED OR DEDICATED VIDEO?

Some might argue that processors such as the new Intel Ivy Bridge, the Sandy Bridge or the AMD Fusion now have integrated graphics and therefore, there is no need for aftermarket video cards. But these integrated chips do not offer the performance that dedicated video cards, not by a long shot.These are not developed for gaming purposes or for rendering, and so, they are not a substitute for a proper video card.
 
 What Video Card Do I Need?

After understanding all the things you will see when browsing for a video card, the next step is to figure out the purpose of your video card. If you are looking for something that will give you performance in gaming, then there are lots of cards with excellent specs. These are not cheap, for that extra performance you will have to pay a few $$. A decent card will start at the $200 mark and it can go up to $1000+ for those who are really enthusiasts. Also, multiple card setups are good. B oth ATI and nVidia offer these solutions: ATI calls it CrossfireX and nVidia calls it SLI. These technologies allow you to pair up two or more identical video cards for a boost in performance. But keep in mind that they have to be identical for it to work. For rendering big amounts of graphics you might need more than these cards can offer. nVidia has the Quadro series dedicated to rendering, so look for those if you are into rendering. For other purposes, like internet browsing and multimedia, lower end cards or even newer models of integrated chips will get the job done. Budget for a Graphics Card

But remember to keep an eye out for budget. Try to find the perfect balance between how much performance you need and how far are you willing to go for that performance. After you figure these out, you will be in front of the task of choosing the model. There are hundreds if not thousands of video card models out there, so choose wisely. To help you make the best choice, refer to your best friend: the Internet. Search for benchmark results on different games or dedicated softwares such as 3DMark or Heaven Benchmark and see which are the best video cards. When you find a few models that suit your needs, then go and read reviews on them. Look at tests on YouTube. These tests and reviews will help you choose the best video card for you.

Same Performance, Different Brand!

 If you are wondering what manufacturer to go with, know this: the different names you see in the shop (Asus, Gainward, Gigabyte etc) all offer basically the same product. There are minor changes from card to card, except cooling system, OC or different values for frequencies. But, in fact, under the hood, there is a stock ATI (AMD) or nVidia chip. The choice between nVidia and ATI is yours.

Today’s video cards offer almost the same performance. Do not get me wrong, they are not the same, but the level of performance is just about the same. I, myself am an nVidia fan, but there are ATI cards that offer the same performance, and when gaming, the difference between two equal cards, one from ATI and one from nVidia is hardly (if at all) noticeable. So forget about phrases like: “nVidia is the best video card manufacturer!”. It’s simply not true, they both offer great products, almost equally good.

How to Assemble Your PC

Before we start, find all the tools you will need, and keep them close, you will need them in your build. Pick a spot where you wish to do your build (I would recommend using a big table) that has proper lighting. Also, before you touch any component, you need to make sure that your hands are not electrically charged, so touch the ground line from a wall socket and make sure you are not wearing clothes made out of synthetic materials, because these charge very quick. GET YOUR TOOLS IN ORDER Before you begin, bring all the boxes with components near you and your tools. For your build, you will need: 1. Cross screwdriver (a magnetic screwdriver would be preferable) 2. Cable pliers 3. Zip ties 4. Box cutter (or an Exacto knife) 5. Regular pliers (you might not need them, but better have a pair handy) 6. Kittens (if it doesn’t work, you will need them for morale support) Once you check that you have everything at hand, start unboxing the components and their accessories, but remember to keep track of everything and not mix them up. After you have finished with the unboxing process, put the boxes away and you can now start your build. Step by Step guide to assembling your computer

 STEP 1: PREPARE THE CASE
We will start our build with the case. By preparing the case, what I mean is mounting any additional accessories that you might have bought, such as fans, fan grills, dust filters or fan controllers. Also, on the motherboard tray, you will see some tiny holes. Take out your motherboard and see which of them line up with the screw holes in the mobo and then mount the special lifters that come with the case.
After this, run all the wires (the cables from the I/O panel) to the back of the motherboard tray and you are pretty much ready with the case. Also, at the back of the case, you will see the expansion slots. They have tiny covers that are hold into place by screws or clamps. Remove them, as you will have to mount other components here. You can put it aside and continue with the motherboard.


STEP 2: PREPARE THE MOTHERBOARD
Now we start actually putting stuff together. Take out your motherboard and lay it on the table (do not put the motherboard directly on the table, but use a towel or the foam protector that it came with). You will have to remove all the stickers and covers from the slots you will be using and be very careful not to let anything in those slots (like dust or other debris). After doing so, you will move on to mounting some of the components. After removing the plastic cover from the CPU socket (be extra careful not to touch the socket or let anything in it), bring your CPU and mount it according to the little triangle in the corner. You will see some kind of marker on the motherboard that lets you know which way to mount the CPU. DO NOT push it in! If you have aligned it right, it will drop into place perfectly. Now, close the bracket that holds the CPU in place.

STEP 3: APPLYING THERMAL PASTE (OPTIONAL)
Applying thermal compound is optional at this point (assuming you have bought a new CPU cooler, it might have pre-applied thermal paste). Some coolers come with thermal compound already applied, but I would recommend getting some tissue and wiping it off. That stuff is pretty low quality, so you might want to buy a good thermal compound (something like Arctic Silver 5) and apply it to the CPU (do not apply thermal paste to the cooler). There are many ways to do this. I can say that I tried all the methods (one line down the middle of the CPU, a blob in the middle, an “X” pattern on the CPU or to spread it out) and I must say I did not notice a difference in temperature. What I do know, is that the thermal compound layer has to be very thin (just enough to cover the CPU, spread it out as much as you can). So, only apply a very tiny amount and use your prefered method to spread it.


STEP 4: MOUNTING THE CPU COOLER
This depends on what type of cooler you have. Stock coolers usually have plastic push pins, which go in really easy: just line them up with the holes and push them down. But if you purchased an aftermarket CPU cooler, it might have a backplate. In general, order to mount it, first secure the backplate (on the backside of the motherboard with the sticky rubber grommets) and then mount your heatsink. In my case, I did not stick the grommets, and I first mount my cooler and the turn the board over and secure it. What is the most important thing when installing the CPU cooler, is to tighten the screws or pushpins in an diagonal. Do not tighten the screw all the way, just a little bit, the do the same on the other side. After it starts holding, mount the other two screws (the other diagonal) and repeat the process. Tighten the screws from each diagonal just a little at a time and go from on to the other until they are tight (but do not force them, when they do not tighten any more, do not force them). When you are done securing the CPU cooler, connect the power line to the CPU_FAN slot on the motherboard and you are done. A tip here would be to mount the cooler so that the wire exits as close to the power connector from the motherboard as possible, then tie it with a zip tie to give it a clean look.

STEP 5: MOUNTING THE RAM
This step is very easy. If you look closely on the RAM board, you will notice a notch. Also, on the motherboard slot, you will see a pin. Position the RAM board so that the notch will be on the pin. Open the bracket and push the RAM board in. When it enters completely, the bracket will close itself. Be sure to mount the RAM with care, verify that it is inserted evenly and no part of the connector are sticking out. This could damage your RAM board or your motherboard.


STEP 6: MOUNT THE MOTHERBOARD IN THE CASE
Now that you have mounted all your components to the motherboard, you can mount it in the case. Before you do so, however, you must mount the I/O panel on the back of the case. It attaches pretty easy, just put it through the inside of the case and gently push it until you hear the click. Afterwords, mount in your motherboard so the external connectors of the motherboard line up with the I/O panel’s cut-outs (also, recheck the alignment of the lifters in which the screws will enter). After you set it right, secure it with screws and you are done.


STEP 7: ADDING THE OTHER COMPONENTS
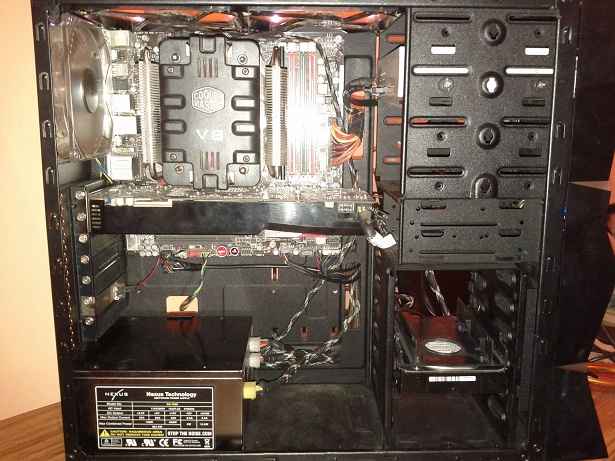
After you have installed your motherboard in the case, you can now add the other components: video card, LAN card, audio card and other that you might have purchased. Also, you can now mount the HDD, optical drive and PSU. If you have a modular PSU, mount it without any wires because you will add them later on. In the case of the video card, notice the holding bracket on the PCI Express slot. It is similar to the one on the RAM slot and it works just the same. Pull it back, align your video card and push it into place. The bracket should snap back in place, securing your card. Now you can tighten the other components with the screws that you took out when you prepared the case (the ones from the extension slots). This will ensure that they are locked into place. When you are done, you can put back the other covers of the expansion slots, so you do not have openings between your components. After all is done, route your cables from the PSU out side the case if you have WM holes, if not, pull them outside the case, because you will be adding them one at a time.


STEP 8: MAKING THE CONNECTIONS
Probably the hardest part yet. Making the connections to your PC is something you need to make right, and to do is, you need to figure out what cables you need from your power supply and where they all go. You will most likely start with the 20/24 pin motherboard connection. this is the biggest, most ugly cable that you have. If your case allows you, you can route it along with the others to the back of the motherboard tray. The next one you should connect is your CPU 4/8 pin connector. In my case, this cable had to be routed inside the PC, not under the motherboard, but try to route it as good as possible, without putting tension in it.
After making the motherboard power connections, start adding the other plugs, such as the front I/O panel (power, reset, USB and audio), data and power connections for hard disks and optical drives, video card and power to your vents. A quick tip before you start making your connections, check that all components are installed and before you move on to managing your wires, turn it on to see it everything works (just for a few seconds). If all is good, you can move on with your cable management. Be sure to have all your zip ties and wire pliers near.


STEP 9: FINAL CHECK AND START UP
Once you are done, make a final verification to your system. Check if all the screws are tight and that no cables have been pulled out while you were doing the wire management. If everything looks properly connected and mounted, you should be ready to go. When you turn on your computer, do not put the cover back, but turn it on a do a visual inspection of the system, to see if there are no problems (short circuits, smoke coming out from some place and that everything works). If all is in order, go ahead and mount your side panels, and proceed to installing your OS. Your build is complete!


STEP 10: TROUBLESHOOTING However, most of the times, you might encounter some errors in the system. In my experience, the majority of systems do not boot at first start. Do not startle, this things are common. The biggest problem would be if your PSU doesn’t have the power to run the entire system, in which case, you might have to return it and get a new one. Most of the time, a one or more connections are not made properly or some components are not mounted properly. Check everything again, and you will most likely find the problem. Also, check your BIOS to see if everything shows up and that all the components are running smooth. And that’s a wrap. If you followed the steps properly, by now you should have a working computer, build by you. And I cannot explain the feeling when you turn it on and see that from a pile of components you have build a working computer. It’s like watching a baby be born.